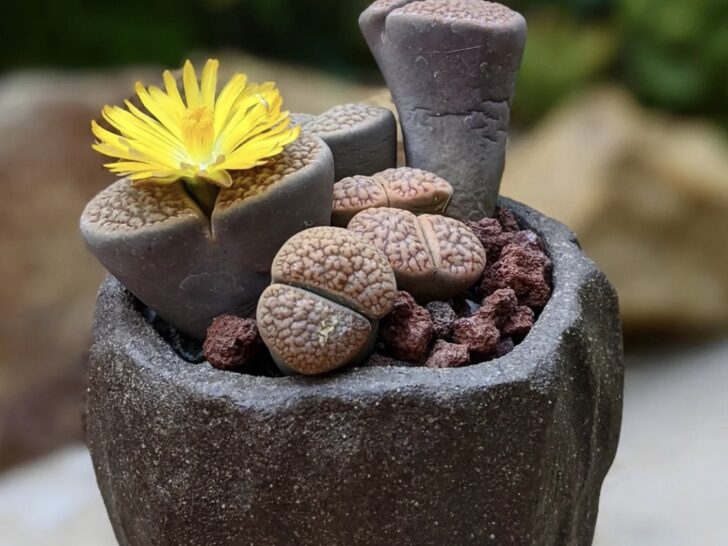

Lithops, known commonly as ‘living stones,’ are small, unusual succulents whose care and propagation differ slightly from your average succulent. These plants are native to arid desert regions of South Africa and therefore have particular watering requirements.
Lithops ‘living stones’ care and propagation are not complex. They require gravel-rich, fast-draining soil, 4-5 hours of direct sunlight daily, and careful watering depending on the season. They make excellent indoor plants and can be propagated by seed or division.
This article will explore how to grow and care for lithops and how to propagate them. I will detail all this plant’s needs, including soil, water, light, temperature, pots, fertilizer, and common pests and diseases.
How To Grow and Care for Lithops ‘Living Stones’
Lithops get their name from the rocky, gravel-rich environments in which they grow. They were first recorded by English explorer John Burchell in 1811 when he bent to collect an interesting pebble and discovered it was, in fact, a plant!
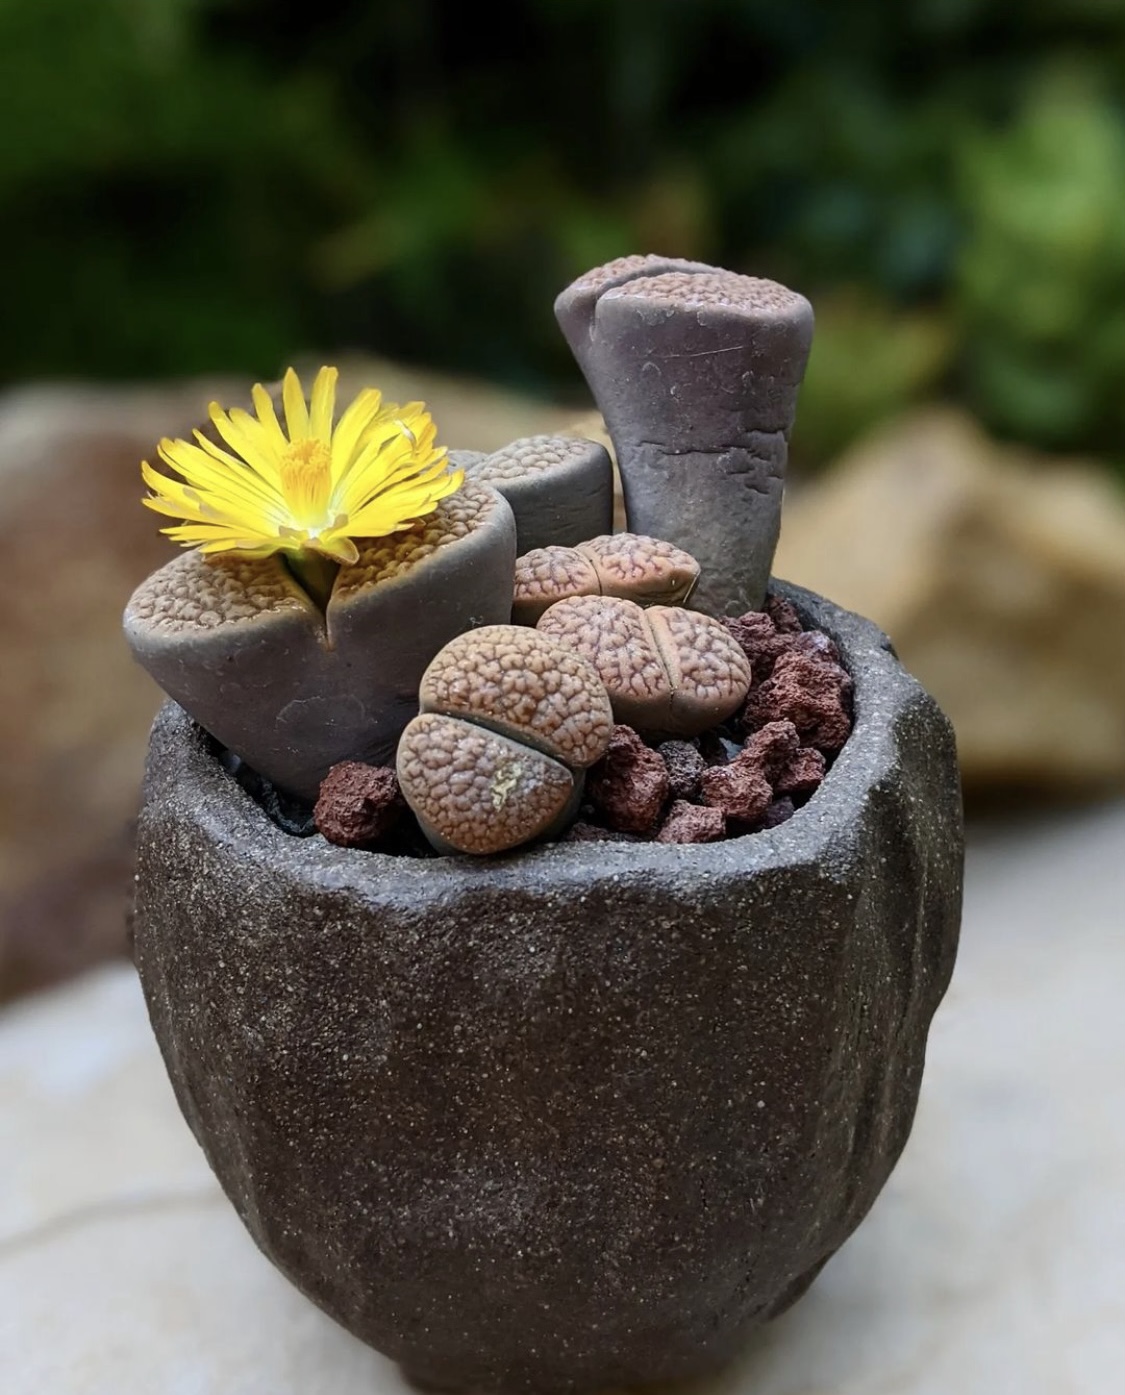
Lithops grow almost flush with the ground in single specimens or sometimes in clusters. Each plant has two thick, fleshy leaves with a seam in the middle. When removed from the ground, they measure 0.5 to 1 inch (1.3 to 2.5 centimeters) in length and 1 to 3 inches (1.5 to 7.6 centimeters) wide.
You may see brown, red, orange, or even pink flowers from the plant. The lithops’ small size, hardy nature, and multiple colors, textures, and patterns make them popular houseplants.
Successful lithops cultivation requires fast-draining soil, proper watering, and good light.
Provide the Right Soil Mix
The right soil mix mimics the desert soil to which lithops are native. The best soil for lithops is similar to typical cactus and succulent soil. However, succulent and cactus mixes sold at garden stores require the addition of aerating substances such as:
- Sand
- Vermiculite
- Perlite
- Gravel
For the best results, use a minimum of 1 part cactus soil to 1 part sand/gravel or another aerating substance to grow lithops.
You can also use regular potting soil instead of succulent or cactus soil. However, increase the sand and gravel component of the potting soil to combat the moisture-retaining qualities of potting soil.
A mixture of 1 part potting soil to 2 parts aerating substance will ensure proper drainage regardless of the potting soil you use.
Avoid Overwatering Lithops
As with all cacti and succulents, overwatering is the number one cause of decline and death in lithops. It can result in eventual failure to flower, grow new leaves, and flourish.
If lithops are overwatered, they will rot, or their growth cycle will become disordered, causing them to produce new growth when they should be dormant.
Watering frequency for lithops depends on the following key factors:
- How quickly the soil dries out
- The time of the year
- Presence of blossoms and new leaves
Watering instructions can differ depending on the variety of lithops, so it’s essential to research your specific plant. The following instructions are for the most common lithops grown as houseplants.
Perform a Moisture Test
A good rule of thumb is to test the soil for moisture before you water the pot. If your pot is large enough, do a finger test. Poke your finger into the soil up to the second knuckle or about 2 inches (5 centimeters).
If the soil is moist, it will feel cold, and the soil will stick to your finger in clumps. It will feel cool or neutral if it’s dry, and your finger will come out clean or faintly dusted with soil.
Use a wooden dowel if there isn’t room to do a finger test without disturbing your lithops. Stick the dowel into the soil and see if it comes out with clumps of dirt. If it does, wait a few days longer and test again. You can also use a disposable wooden chopstick in place of a dowel.
Water in Late Spring Through Fall
Water deeply whenever the soil has dried out. The best time to water lithops is early in the day so that the upper layer of soil dries out faster. You want the top inch (2.5 centimeters) or so to remain wet for only a day or two.
Lithops go dormant in summer when the weather is at its hottest. During this time, they live on the water stored in their leaves. This is a survival technique that allows them to survive extreme drought.
At this point, water only if your lithops start to look shriveled. Then give them a light watering, wetting just the top half inch (1.3 centimeters) of soil. They should plump back up within a day or two.
You can begin watering again in late summer through the fall. This is when lithops come out of dormancy and start to grow again. You’ll know it’s time because the seam between the two leaves of your lithops will widen in preparation for a flower to grow from the center.
Don’t Water in Winter and Early Spring
Allow your lithops to dry out completely during winter through early spring. Lithops need to rely on water from their old leaves to feed the growth of new leaves, so you should avoid watering too early.
The new leaves should be fully formed by early spring. However, wait until the old leaves are properly dried out before resuming your watering schedule. If you water too soon, the old leaves will come back to life and compete with the new leaves, stunting the new growth.
Expose Lithops to Direct Sunlight
Lithops grow best in a greenhouse, but a windowsill with 4-5 hours of direct sunlight during the day will also do very well. However, it’s important to note that lithops prefer early and midday sunlight to harsher, hotter late afternoon sunlight.
For this reason, a south-facing window is the best choice as it gets the early morning sunlight and should be shaded in the afternoon. An east-facing window is the next best choice.
You’ll know if your lithops isn’t getting enough light because it will grow longer and skinnier. It will also develop a lean from trying to reach the light. Finally, it may lose its color and eventually die.
If your lithops shows signs of needing more light, move it to a better location, but provide it with partial shade to let it adjust to the increased light. An abrupt change in lighting can cause scorching.
Consider Using Artificial Light
If you don’t have an appropriate place to keep lithops where they can receive the right amount of sun, I recommend using a grow light. This way, you can keep the plant at your desk, on an end table, on a shelf in your living room, etc., and enjoy it any time.
I recommend white LED grow lights instead of fluorescent or red-blue grow lights. LEDs are energy efficient, last for years, and provide full-spectrum light, which lithops need to flourish.
In addition, other types of grow lights can put off a lot of heat, damaging your plants and making your home too warm.
The GHodec Grow Light for Indoor Plants from Amazon.com is a good choice. It can be clipped to shelves and tables and has an adjustable gooseneck that allows you to place the light exactly where you need it. It also has a timer, so you can set it and forget it.
Remember that artificial light is much weaker than sunlight, so your lithops will need 6-8 hours of it each day. Position the light source a maximum of 12 inches (30 centimeters) above the plant for best results.
Provide Partial Shade in High Temperatures
Because they are desert plants, Lithops can survive surprisingly high temperatures. However, lithops exposed to temperatures above 90°F (10°C) must also be provided with good air circulation and at least partial shade. Stagnant air and direct sunlight in high temperatures will cause damage to your plant.
Likewise, most lithops can survive relatively low temps, but you should never allow them to freeze. If temperatures drop below freezing where you live, move your lithops away from doors and windows.
Ideally, you should keep lithops between temperatures of 50-90°F (10-32°C). However, they can survive temperatures on either side of that for short periods.
Choose Pots With Plenty of Drainage Holes
Lithops grow best in pots with plenty of drainage holes. A single drainage hole is acceptable in a small pot, but make sure the hole is relatively large. Pots with no drainage or poor drainage will significantly slow the drying of the soil and cause your lithops to rot.
Although lithops are tiny succulents, they have comparatively large root systems. They, therefore, need deeper pots than their size would suggest. Put mature lithops in a pot 3 to 5 inches (8 to 13 centimeters) in depth.
You can plant several mature (3+ years old) lithops in a single pot. I recommend a pot 4 to 6 inches (10 to 15 centimeters) in diameter, so the plants don’t have to compete with each other for nutrients.
If you want to put more lithops together, use a wider pot, but not a significantly deeper one. A too-deep pot will hold on to excess moisture, resulting in rotting.
Follow these steps when potting lithops:
- Once the pot is filled with soil, gently pat it down.
- Use your finger or a pencil to poke a hole in the soil. It should be big enough to accommodate your lithops and its roots.
- Plant your lithops with the tops just above the surface of the soil.
- Mimic lithops’ natural environment by topping the soil with decorative gravel or small river stones.
Best Pot Material for Lithops
While you can plant lithops successfully in any sort of pot, some materials are more beneficial than others. Namely, ceramic and terracotta are the best choices. These materials are porous and naturally draw water from the soil, which can help prevent overwatering.
Terracotta is especially recommended because it darkens when wet. It shows the soil’s water level inside the pot, reducing the need for a soil moisture check.
Fertilize During the Growing Season
Lithops really don’t need fertilizer. However, if you want to boost their growth, you can give them very diluted, high potassium, low nitrogen cactus fertilizer like Schultz Cactus Plus 2-7-7 Liquid Plant Food from Amazon.com.
Don’t apply fertilizer to the leaves, as it can cause burning and discoloration. Only fertilize during the growing season, and only give fertilizer a maximum of 2 to 3 times per season.
Over-fertilizing will burn your lithops’ roots, causing discoloration and damaging its ability to absorb water and nutrients.
Watch Out for Pests and Diseases
Luckily, lithops are highly resistant to pests and disease. The most common problem for this plant is rotting due to overly moist soil. This can be root rot, or the rot can occur in the fleshy part of the plant, starting beneath the soil’s surface.
The best way to protect your lithops from rot is to use fast-draining soil, a terracotta pot, and water only when the soil is dry during the appropriate seasons. If your plant gets rot, it will likely not survive.
However, if you catch it early on, you may be able to save the plant. Here’s what you should do if you suspect rot is happening under the surface:
- De-pot the lithops and get rid of the infected soil. Rot stems from fungal overgrowth, so you cannot reuse the infected soil. It will just reinfect whatever plant you put in it.
- Clean away any rotted roots. You can tell which roots are rotten because they will be mushy, dark, and foul-smelling. If the rot has moved to the fleshy body of the lithops, it’s probably too late, and your plant will die.
- Re-pot the plant in a clean, sanitized pot with fresh soil. Ensure the soil meets the parameters described in the soil section above.
- Water with a 50/50 mixture of water and hydrogen peroxide. This will kill any remaining fungus and help get oxygen to the roots while they recover.
Lithops rarely get pest infestations. However, they can suffer from red spider mites and occasionally other sap-sucking insects. Red spider mites are tiny red sap-suckers that thrive in warm, dry conditions. Usually, they are only an issue for lithops if you’re keeping them in a greenhouse.
The mites are easy enough to spot crawling on your plants. You may also notice fine white webbing on the leaves. Once you have identified that your plant has mites, quarantine it away from other plants to stop the infection from spreading.
Usually, you can eliminate spider mites by upping humidity and moisture. However, as you know, that’s not good for lithops!
Here are some other options for resolving spider mite (and other insects) infestations:
- Spray the plant with 70% isopropyl alcohol. The alcohol will evaporate quickly, preventing excess moisture and killing any mite it touches. However, you should still be careful not to soak the soil.
- Use insecticidal soap. You can make this easily from 1 tablespoon (15 milliliters) of dish soap and 1 quart (0.9 liters) of water. Spray the plant with the mixture. Again, don’t soak the soil.
- Spray the plant with neem oil. You can buy neem oil at any garden supply store or online. It generally comes pre-diluted in a spray bottle.
Note: These options will generally require multiple treatments, as spider mites are hard to eliminate. Also, be sure to check your other plants for signs of infestation. Quarantine and treat any that are affected.
How To Propagate Lithops ‘Living Stones’
Lithops can be propagated in two ways. One is by seed, and the other is by division. Both take quite a while, as lithops are slow growers and only mature once they are at least three years old. However, it’s possible with a bit of time and patience!
Propagation By Seed
This is the faster of the two ways to propagate lithops. Follow these steps to propagate lithops by seed:
- Collect the seeds from the flowers after they have died and fallen off.
- During summer, sprinkle the seeds over a soil mix similar to the one described above. It should have lots of sand.
- Once the seeds are in place, cover them gently with a thin layer of sand and spray carefully with water to moisten them.
- Leave the pot in a warm spot with plenty of light, and check the moisture level regularly. They should be kept moist but not soaked.
On average, the seeds will take 2 to 3 weeks to sprout, but some may take months or longer. Once the sprouts are a few months old, you can start allowing the soil to dry out between waterings. Start with a day or two and slowly lengthen the time between waterings until you can water them like adult lithops.
You will only need to re-pot the baby lithops once they are about a year old.
Propagation By Division
Lithops can also be propagated by division, which involves separating a plant with more than one head. Of course, this is not something you can force to happen. Your lithops has to divide naturally.
However, once you see two fully-developed plants, remove them from the soil and carefully cut the roots apart. Avoid causing significant damage and ensure each plant retains a healthy tap root. Replant them both immediately.
Conclusion
Lithops are exciting and unusual succulents that stay very small, come in wide varieties, and are relatively easy to care for as potted house plants. Give them sand and gravel-rich soil, a pot with drainage holes, water them carefully, and give them 4 to 5 hours of direct morning sunlight each day.
Finally, you can propagate them by harvesting seeds from dead flowers and sowing them in sandy soil or dividing plants with multiple heads.
Other Articles You May Also Be Interested In
Astrophytum Asterias ‘Star Cactus’ Care And Propagation